
News
A Practical Guide to Cut Vinyl for Signs

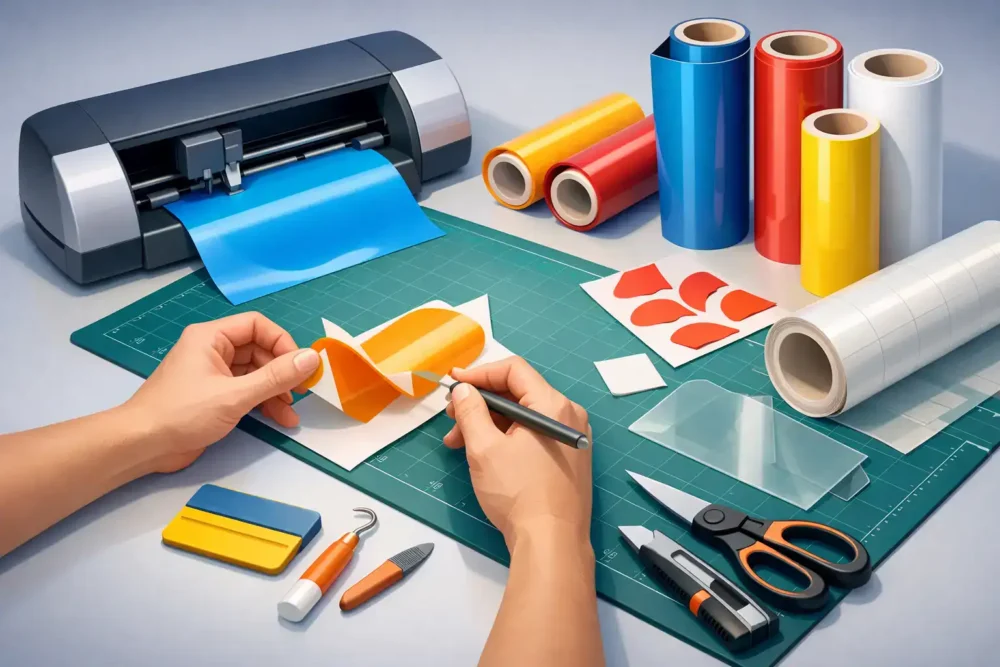
A clean cut vinyl graphic can turn a shop window, site vehicle or hoarding panel into clear, hard-working advertising. This guide to cut vinyl explains how to choose, cut and apply sign vinyl properly, so your message stays sharp rather than lifting at the edges, bubbling or fading before its time.
Cut vinyl is a practical choice when you need bold lettering, simple logos, directional arrows, safety markings or single-colour graphics. It is widely used across construction sites, retail premises, offices, exhibition spaces and vehicle fleets because it is durable, cost-effective and easy to read from a distance.
What Is Cut Vinyl?
Cut vinyl is coloured self-adhesive film that is cut to shape with a vinyl plotter. Unlike digitally printed vinyl, where ink is printed onto a wide sheet of material, cut vinyl starts as a solid colour. The plotter follows the outline of your artwork, cutting letters, shapes and logos into the film without cutting through the backing paper.
Once cut, the unwanted material is removed in a process called weeding. Application tape is then placed over the finished design, allowing the whole graphic to be transferred accurately onto the chosen surface.
The result is a crisp, professional finish with no printed background. For simple branding, opening hours, health and safety messages or fleet lettering, cut vinyl often gives a cleaner appearance than a full printed sticker.
When Cut Vinyl Is the Right Choice
Cut vinyl is best suited to artwork with clear outlines and a limited number of colours. Think business names on windows, contact details on vans, site entrance lettering, directional signs, wall graphics and simple promotional messages.
It can be layered to create multi-colour logos, although each colour is cut and applied separately. This works well for straightforward branding but can become less practical where artwork includes many colours, fine gradients or photographic detail. In those cases, printed vinyl is normally the better option.
For a construction site, cut vinyl can be an effective way to add contractor details, warning messages or directional information to boards and hoarding. For retail, it is ideal for seasonal window offers, opening times and branded glass manifestations. The key is matching the method to the artwork and the surface.
Choose the Vinyl for the Job
Not all sign vinyl is made for the same conditions. Choosing the cheapest material without considering where it will be used can create avoidable replacement costs later.
Calendared vinyl is a popular, economical option for flat surfaces and shorter-term campaigns. It works well for indoor graphics, flat boards, windows and promotional signage where the graphic does not need to follow deep curves or withstand years of harsh weather.
Cast vinyl is thinner, more flexible and designed for demanding applications. It is generally the better choice for vehicle graphics, curved panels, rivets and long-term outdoor use. It costs more, but it is made to conform more closely to the surface and maintain its finish over a longer period.
Also consider the adhesive. Permanent adhesive is suitable for long-term signage and vehicle branding, while removable adhesive is useful for temporary window promotions, events and campaigns where clean removal matters. Frosted, etched-effect and high-tack films are available for specialist jobs, including privacy graphics, textured surfaces and difficult substrates.
Preparing Artwork for Vinyl Cutting
A plotter needs vector artwork. Vector files are built from points and paths, meaning the plotter can follow a precise cutting line at any size. Raster images such as JPGs and screenshots are made from pixels, so they cannot always be cut accurately without tracing or redrawing.
Keep lettering large enough for the finished application. Very small text, thin strokes and tightly spaced letters may look acceptable on screen but can be difficult to weed and apply. As a practical rule, simplify wherever possible. A bold, well-spaced typeface will perform better on a van or shopfront than intricate lettering that disappears at viewing distance.
Avoid unnecessary detail in logos intended for cut vinyl. Small internal gaps, narrow corners and delicate flourishes can lift during weeding or fail to adhere fully outdoors. If a graphic must be read quickly from several metres away, simple shapes and strong contrast will always do more work.
Before production, check the final dimensions, spelling, telephone numbers and colour references. A proof is not just a formality. It is the point at which a costly site-board error or a mis-sized vehicle graphic can be prevented.
How to Cut Vinyl Cleanly
Plotter settings depend on the vinyl type, blade condition and machine. There is no single setting that suits every roll, which is why a small test cut is essential before starting a production run.
The blade should cut through the vinyl face film cleanly while leaving the backing paper intact. If the cut is too shallow, the design will be difficult to weed and fine details may tear. If it is too deep, the backing paper is scored, making application awkward and increasing the risk of the graphic stretching or misaligning.
Start with the manufacturer’s recommended blade pressure and speed, then test a small square with a circle inside. The shapes should weed away easily, while the backing should show only a faint impression rather than a deep cut. Reduce speed for intricate text or detailed logos. A slower, controlled cut usually saves time compared with repairing a damaged graphic afterwards.
Keep the blade clean and replace it when cuts begin to look ragged. A worn blade can pull at the vinyl instead of slicing it, particularly around tight curves and small lettering. Clean cutting strips and correctly loaded media also make a noticeable difference on longer runs.
Weeding and Applying Transfer Tape
Weeding is where the design becomes visible. Remove the excess vinyl slowly, beginning with the larger surrounding areas before working through the smaller internal pieces of letters such as A, O, P and R. Good lighting helps, especially with pale vinyl or detailed text.
Transfer tape holds the finished graphic in position for application. Paper tape is often suitable for standard lettering and flat graphics, while clear tape can make alignment easier where accurate placement matters. Apply it with even pressure using a squeegee so that every part of the vinyl is picked up securely.
For larger graphics, use a hinge method. Position the graphic with masking tape, create a central or top hinge, then lift one section at a time to remove the backing paper. This gives better control and reduces the chance of the vinyl folding onto itself.
Surface Preparation Makes the Difference
Even premium vinyl will struggle on a dirty, damp or poorly prepared surface. Dust, silicone, wax, grease and residue can all prevent the adhesive from bonding correctly.
Clean the application area thoroughly with an appropriate surface cleaner, then allow it to dry completely. Glass, smooth painted metal, sealed boards and many plastics are suitable surfaces, provided they are clean and stable. Fresh paint should be fully cured before vinyl is applied, as solvents escaping from the paint can cause bubbles or adhesive failure.
Temperature matters too. Applying vinyl in very cold, wet or humid conditions can affect adhesion. If you are fitting graphics on site, aim for a dry, sheltered area and follow the recommended temperature range for the film. Vehicle graphics should not be applied to panels that are hot from direct sun, icy cold or covered in road film.
Applying Cut Vinyl Without Bubbles
Position first, then commit to the application. Measure from a fixed point such as a window edge, panel line or board corner rather than relying on visual judgement alone. On repeated fleet graphics or multiple site signs, make a simple positioning template so every installation is consistent.
Peel back a small section of backing paper and apply the vinyl gradually with overlapping squeegee strokes. Work from the centre outwards to push air towards the edges. Do not pull the vinyl tight as you apply it, particularly on long lettering, because stretched material can shrink back later.
Once the vinyl is in place, firmly squeegee the entire graphic again before removing the transfer tape. Pull the tape back slowly at a sharp angle, close to the surface. If a letter starts to lift, lay the tape back down, apply more pressure and try again.
Small bubbles can sometimes be worked to the edge with a squeegee. Larger bubbles or trapped debris are usually a sign that the surface was not prepared well enough. For customer-facing signage, it is normally better to replace a visibly flawed section than hope it becomes less noticeable.
Care, Lifespan and Removal
The life of cut vinyl depends on the film, location, surface and exposure to weather. Indoor graphics on smooth glass may look good for years. Outdoor vehicle lettering, coastal signage and south-facing windows face more UV light, rain, road grime and temperature changes, so material choice becomes more important.
Allow newly applied graphics time to bond before washing. For vehicle graphics, avoid pressure washing directly at edges and corners. Regular gentle cleaning will keep lettering legible and help protect the finish.
When it is time to remove vinyl, gentle heat can soften the adhesive. Peel slowly at a low angle and remove residue with a suitable adhesive remover that is safe for the substrate. Older permanent films can take more time, particularly if they have weathered heavily, which is another reason to specify the right product at the start.
For businesses needing reliable cut vinyl graphics alongside banners, site boards, window displays or fleet branding, Big Value Banners can help turn clear artwork into practical signage made for real working environments. Start with the message people need to see, choose vinyl that matches the surface and lifespan, and the finished graphic will earn its place every day.


